In order to prepare a client installation of ODI 12c on a readhat 7.4 machine, I performed installation of ODI 12.2.1.3.0 on a Centos 7.4 machine (Machine created on Azure). you will find hereafter screenshots and explanation of this installation.
The article being quite long, I’ll split it in several posts.
As you will see on screenshot, I used MobaXterm 10.5 to connect to the machine. (https://mobaxterm.mobatek.net/).
Setup of the VM
This part is a bit out of scope but as I had to setup the VM before I could perform the installation, I added this section to be complete.
First connection to the VM

X11 forwarding is disabled.
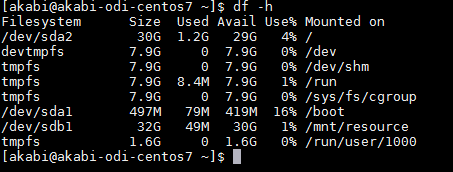
I went for a 32Gb machine, more than enough.
Started downloading source files from Oracle :
- ODI 12c – The object of desire
- fmw_12.2.1.3.0_odi_Disk1_1of2.zip
- fmw_12.2.1.3.0_odi_Disk1_2of2.zip
- Oracle XE – we will need a database for the repositories
- oracle-xe-11.2.0-1.0.x86_64.rpm.zip
In the meantime, we need x11 forwarding effective.
Enable X11 forwarding

X11Forwarding was already set to yes in /etc/ssh/sshd_config
Restart of the session :
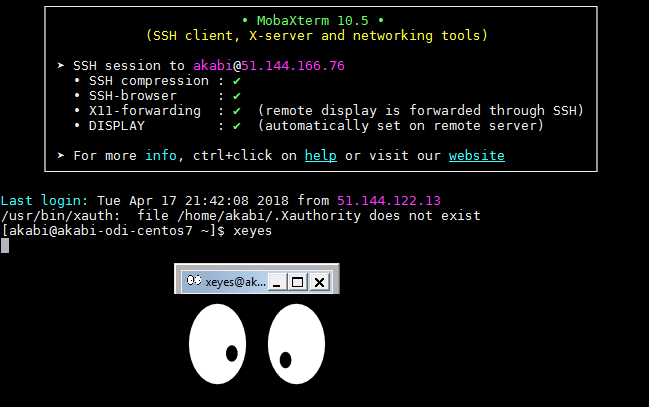
X11 forwarding ok
Set Swap
Documentation requires 2Gb of Swap memory

Quick and dirty, I created a file of 2.4 Gb.
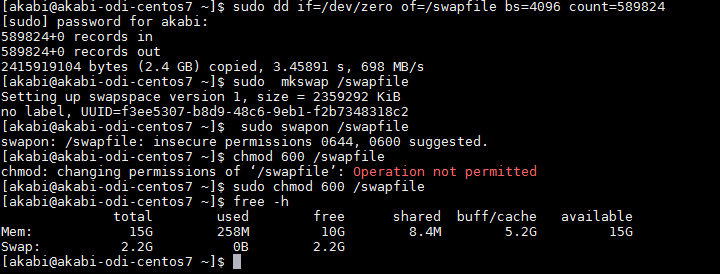
(You will see on the screenshot, I forgot a sudo, you probably already noticed, for clarity I didn’t add them to the code boxes)
Install JDK
Documentation note 12.2.1.3.0 is certified with JDK 1.8.0_131 and higher. Cf. System Requirements and Supported Platforms for Oracle Fusion Middleware 12c (12.2.1.3.0) ( xls)
For ease, I install last available version of 1.8, at install time : JDK 1.8.0_161.
As we will see later, for some reason version 161 is incompatible. I made this test with JDK 1.8.0_131, I later installed on windows successfully with version 172. To be complete and show issues that can arise during installation, I let all original screenshots.

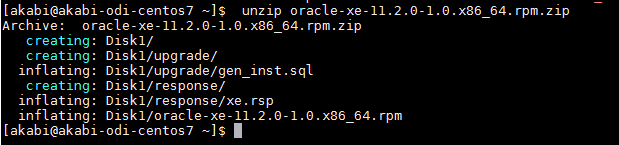
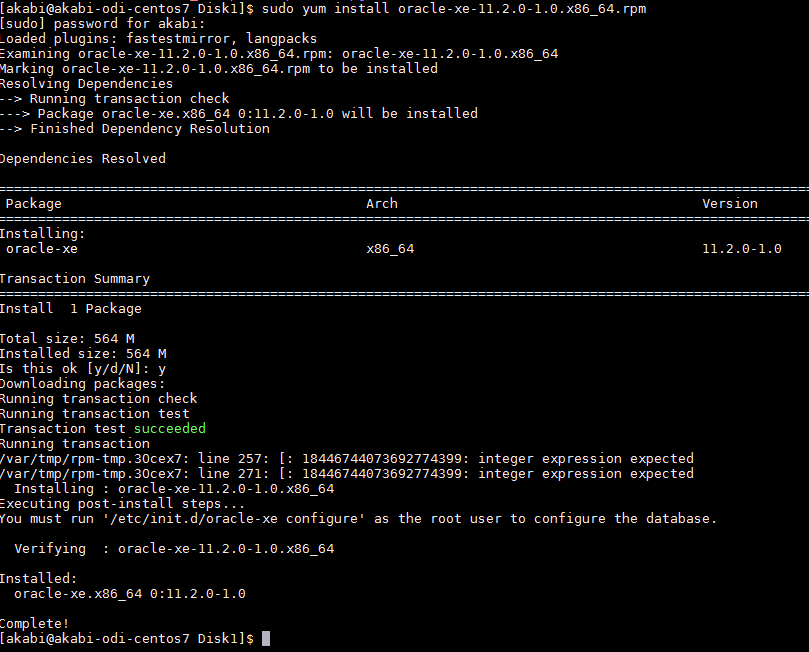
Install Oracle XE
I wanted a db on the machine for repository, I found interesting to test installation with Oracle XE.
Source : oracle-xe-11.2.0-1.0.x86_64.rpm.zip


Now do as suggested execute config:
Not much to do, select all default and set the sys password (note it down…).
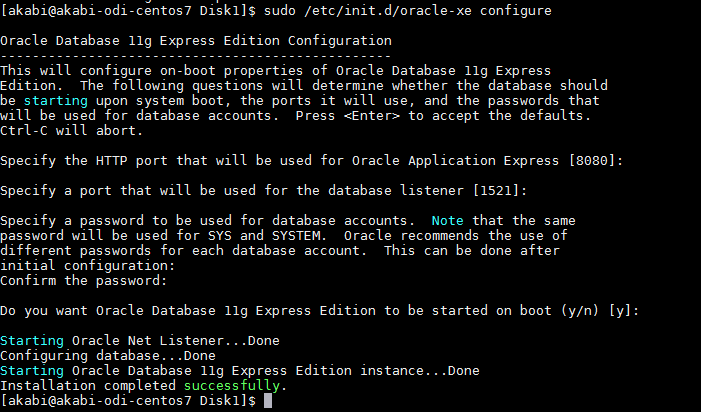
Start the database

Set environnement variables

If you need to allow activate remote connection
Then in sqlplus perform : 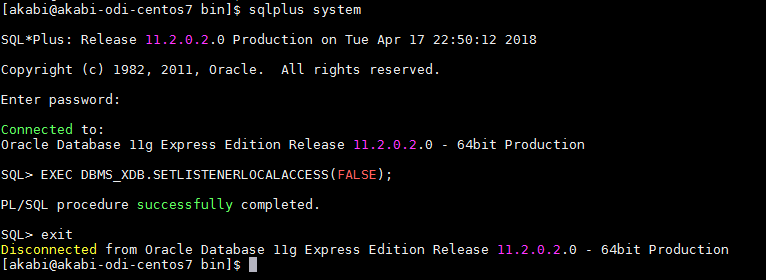
Our DB for ODI repo is now ready.
Time to install the real stuff, see : Installation of ODI 12.2 on Centos 7.4 – Part 2 – ODI Installation
Do not hesitate to contact us.

2 thoughts on “Installation of ODI 12.2 on Centos 7.4 – Part 1 – Machine setup”